QUICK SHOT CARD READER INSTALLATION INSTRUCTIONS
- Before you start the installation make sure all credits and tickets are cleared from the game memory. Then with the power off on the game you can start the card reader installation.
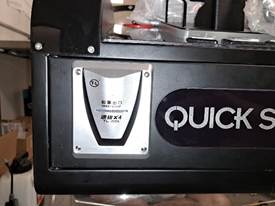
- Identify the mechanical ticket mech ( as seen in the above picture),

- Before removing the Mechanical ticket mech please unplug the ticket wire harness. You will see that the wires are Yellow ( 12 V+) Black (12V-) Green ( ticket out) and white ( ticket in). Remove the ticket mech by unbolting the 4mm flange nut (7mm socket) from the backside of the front cabinet ticket door.

- Find the Ticket mech block off plate inside the spare parts bag that came in the same box as the player console.
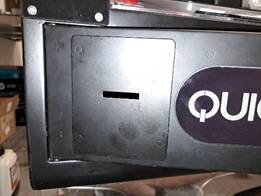
- Attached the block off plate with the same M4 flange nuts used to hold on the ticket mech.
PLEASE NOTE THE NEXT STEPS (6-8) IS ONLY NEEDED IF YOU ARE RUNNING INTERCARD SYSTEM. ALL OTHER CARD SYSTEMS WILL BE ABLE TO ACCEPT A NEGATIVE PULSE AND SHOULD NOT NEED THIS BOARD.
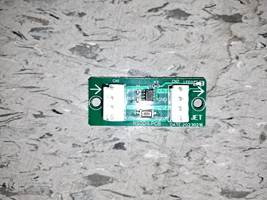
- Above is a “ticket Signal inverter board.” This board takes the negative or “Drop down” pulse from the game and flips the pulse to a positive or “pull up pulse” so that a certain card readers can work/communicate with this game’s drivers.

- Find a location to mount the Ticket board, a good spot is the raised M3 stud to the left of the ticket mech mount. You will need a M3 screw to mount it as seen in the picture. The game ticket mech harness will plug directly into the ticket board in the spot marked either “CN1”, “J1” or “Ticket In”.

- Attach the wires from the Card readers ticket signal to the other side of the Ticket Board. This side of the board will be marked with either “CN2”, “J2” or “Ticket Out.”
PLEASE NOTE THIS STEP (9&10) IS FOR ALL CARD SYSTEMS ABLE TO ACCEPT A NEGATIVE PULSE AND REPLACE STEPS 6-8.
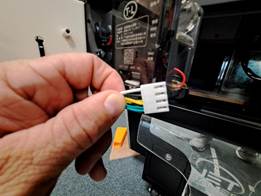
- In the picture above is the ticket Mech wire harness from the game side. As stated in step 3 the wires are Yellow ( 12 V+) Black (12V-) Green ( ticket out) and white ( ticket in ). For an Embed reader you would connect Yellow to Red, Black to Black, White to White and Green to Blue. For other card readers you will need to identify the wire colors in their manual as I am not familiar with them.
- In your card readers system you will need to change the pulse parameters in the system to accept a negative or “Pull down” pulse for the ticket and notch signals for this operating system to allow the card system to communicate with the game. A 2ms pulse should work with a voltage drop of .5 volts.

- Unplug the Coin Mechanism’s wire harness (as in above picture) and splice into the Green and the black wire from the game harness. The green wire is the Coin up wire and the black wire is the Constant Ground. ( On an Embed install the wires will go Green to “Orange & Black”, and Black to “Yellow & Black”). You can leave the other wires alone and keep the Coin mech unplugged unless you plan on using the coin mech in conjunction with the card system.
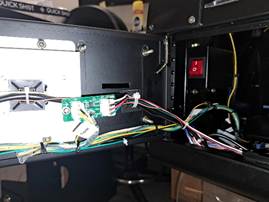

- Please secure all the wiring from your installation to the game cabinet to keep from having any broken or frayed wires in the future. See above for reference. Remember this is a metal cabinet so loose connections will cause issues in the future.
IF YOU ARE SETTING THIS GAME UP AS PLAY VALUE AND DO NOT WISDH TO PAY OUT TICKETS YOUR INSTALL IS COMPLETE, IF YOU WANT TO AWARD TICEKTS PLEASE FOLLOW THE BELOW INSTRUCTIONS IN THE GAME MENU.
- Once all connections are made you can turn back on the game and enter the game menu by holding down the green service button on the inside of the ticket door.
- Once inside the game menu go to “Systems”, then “ Basic”, Then highlight the menu option “Award Mode”.
- Once selected “Award Mode” change that setting to “Tickets.” Once “Tickets” is selcted go down to “Back” to exit the menu. When the menu asks you to save seting click on “YES”.